

|
|
|
||||||||
|
|
|||||||||
| Home | Forums | Register | Gallery | FAQ | Calendar |
| Retailers | Community | News/Info | International Retailers | IRC | Today's Posts |
 |
|
|
Thread Tools |
|
|
#1 |
|
Classic Army (CA) SCAR-H Disassembly Guide
After having a few problems with my Classic Army SCAR-H and finding virtually nothing on-line for any sort of help with the SCAR-H, more specifically the Classic Army (CA) SCAR-H, I had some help from a friend and I put together a How to/disassembly guide and the solution to some problems that I've come across.
Note: This guide will NOT cover taking apart the mechbox as I am not that experienced but I will cover everything else. ------------------------------------------------------------------------------------------------------------------------------------------------------------------------------------------------- Step #0 - Pre-disassembly Remove magazine, make sure no BB's are in hop-up unit, and remove the stock of the gun. 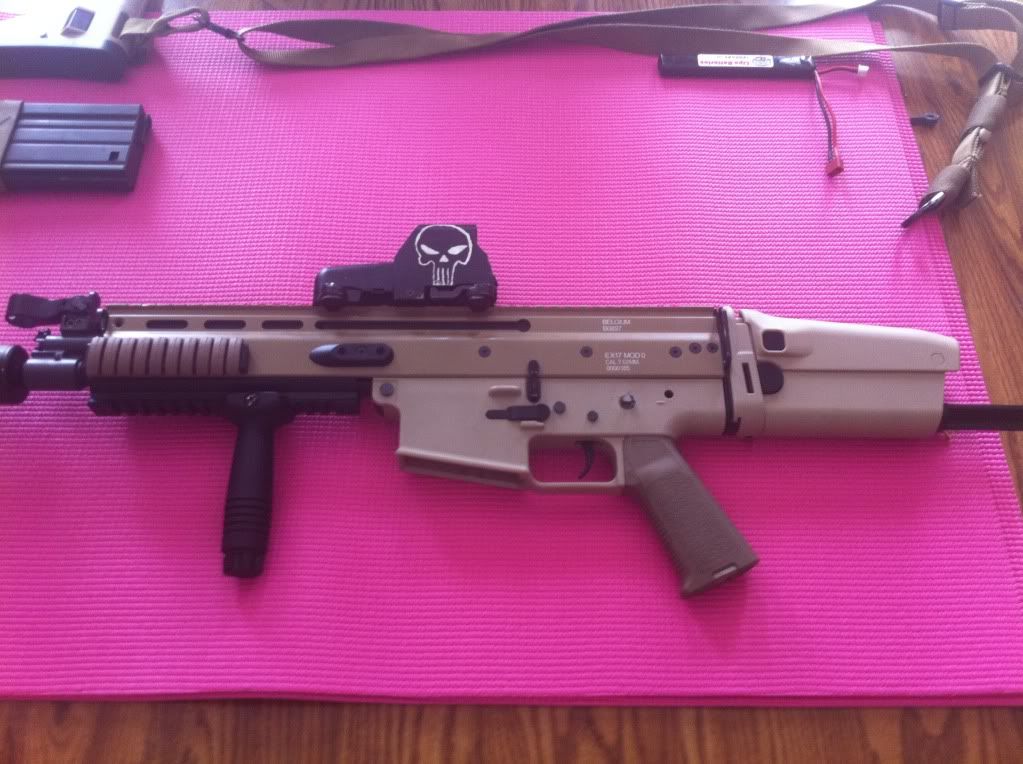 Step #1 Remove screws nearest the barrel tip  Step #2 Remove the screw on the bottom of the handrail nearest the hop-up unit and now the outer barrel and handrail will slide off, revealing the inner barrel.  It should look like this... 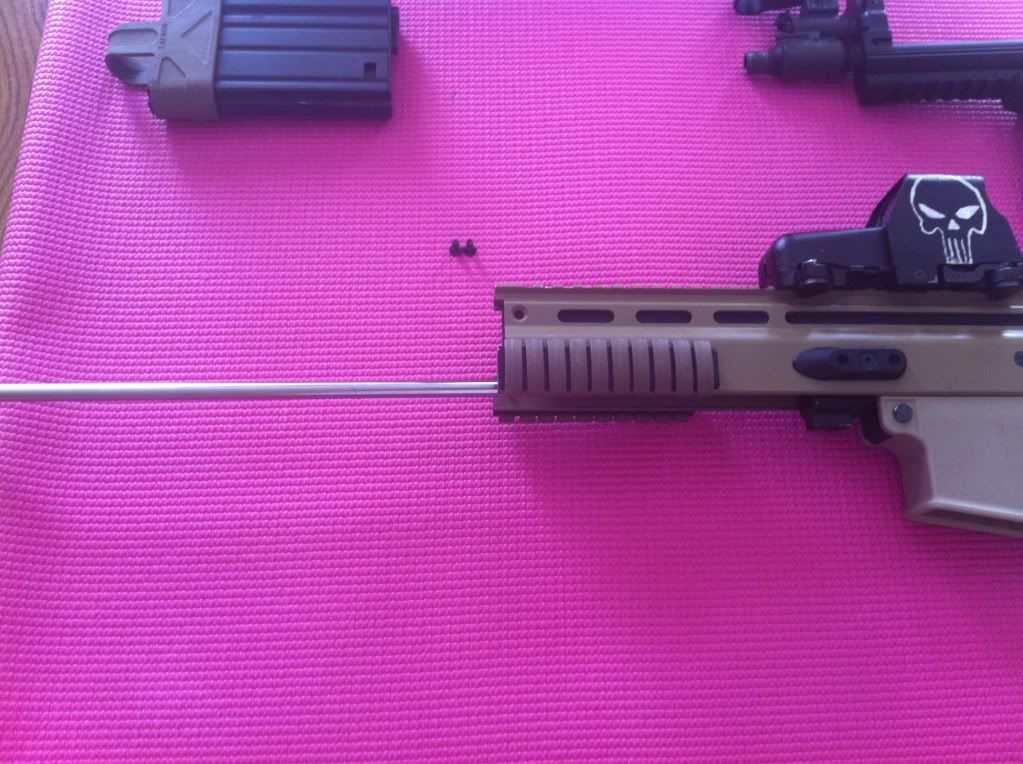 Step #3 Remove the plastic covers in the leftmost position and second most right position to reveal the screws and unscrew them to pull the side rail off, repeat for both sides.  After removing the covers you will see this... 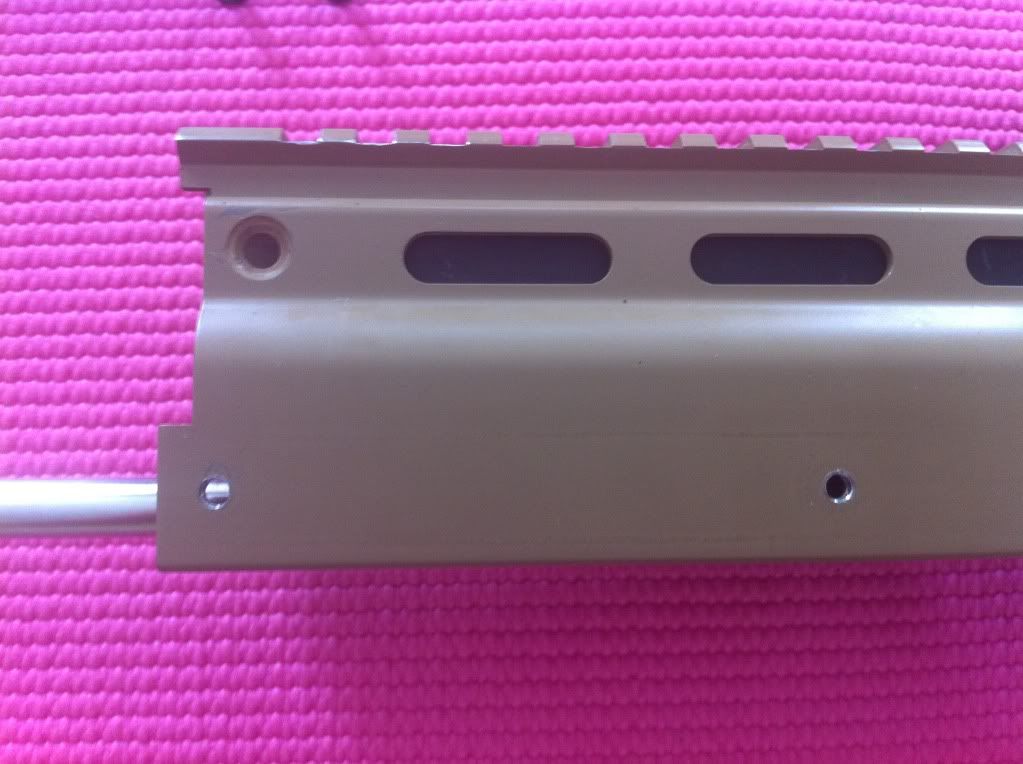 Step #4 In order to remove the hop-up unit we must knock out the two receiver pins. Once we have done this the hop-up and inner barrel will easily slide out.  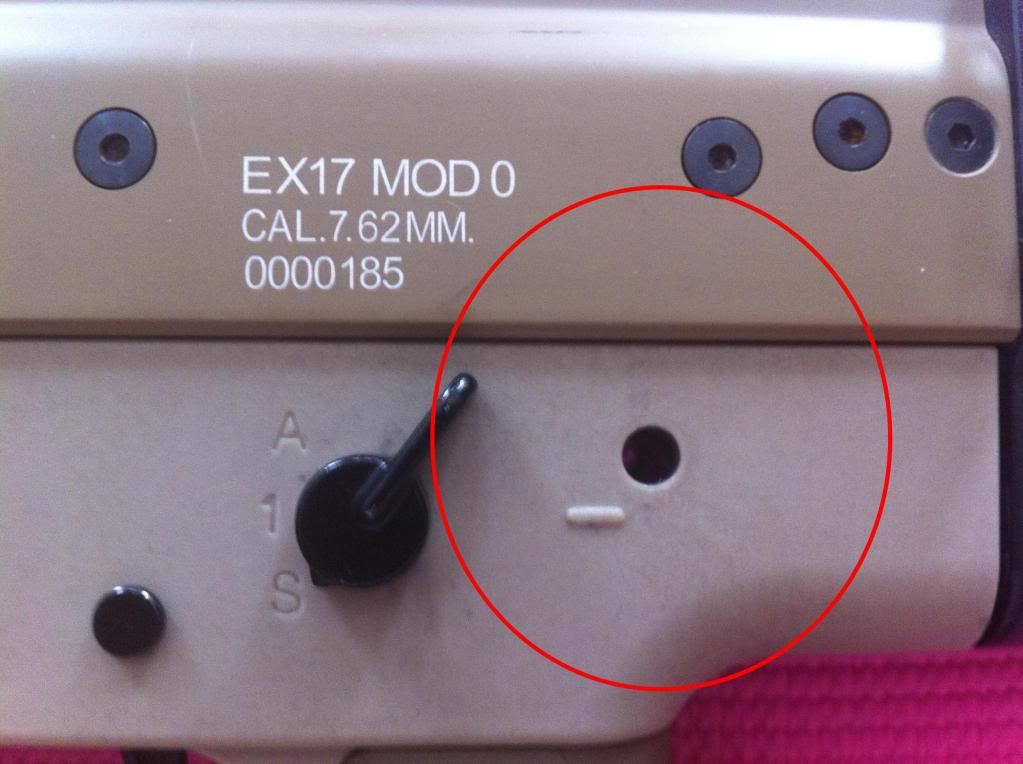 Once the inner barrel is removed it will look like this... 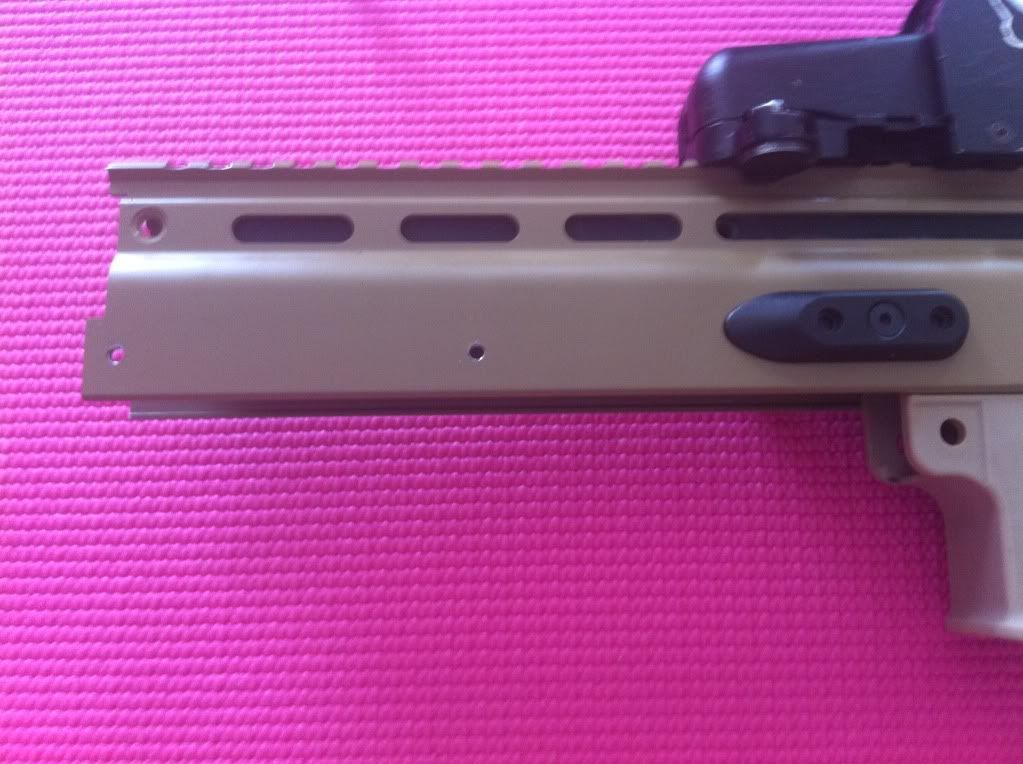 Step #5 Next we want to remove the slide, in order to do this we must unscrew the screws that are holding the plates on, that are located above the front most receiver pin we just took out, remove on both sides.  A removed plate will look like this... 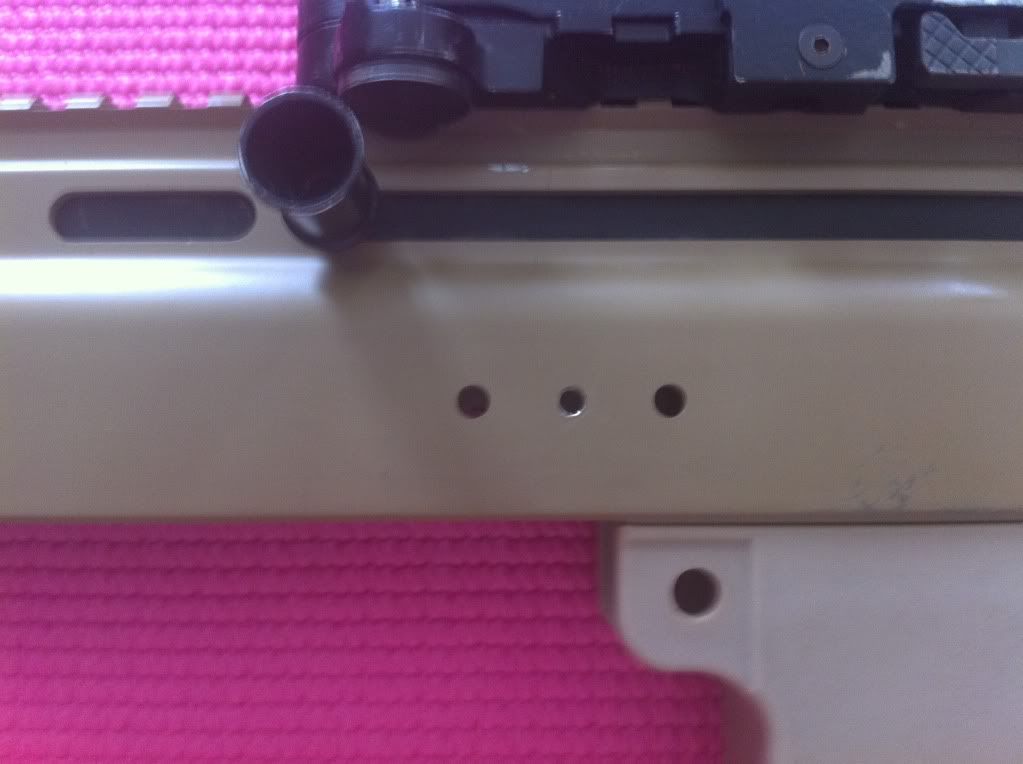 Step #6 Now in order to remove the slide we must unscrew the handle located just under the mounting rail and above the plates we just removed. Once this is done the slide and will easily come out.  Step #7 Now we will be removing the lower receiver. In order to do this it's best to open up the stock and feed your battery wire through, to avoid damaging it. Carefully feed the battery wire through each hole and slide the lower receiver free of the upper.  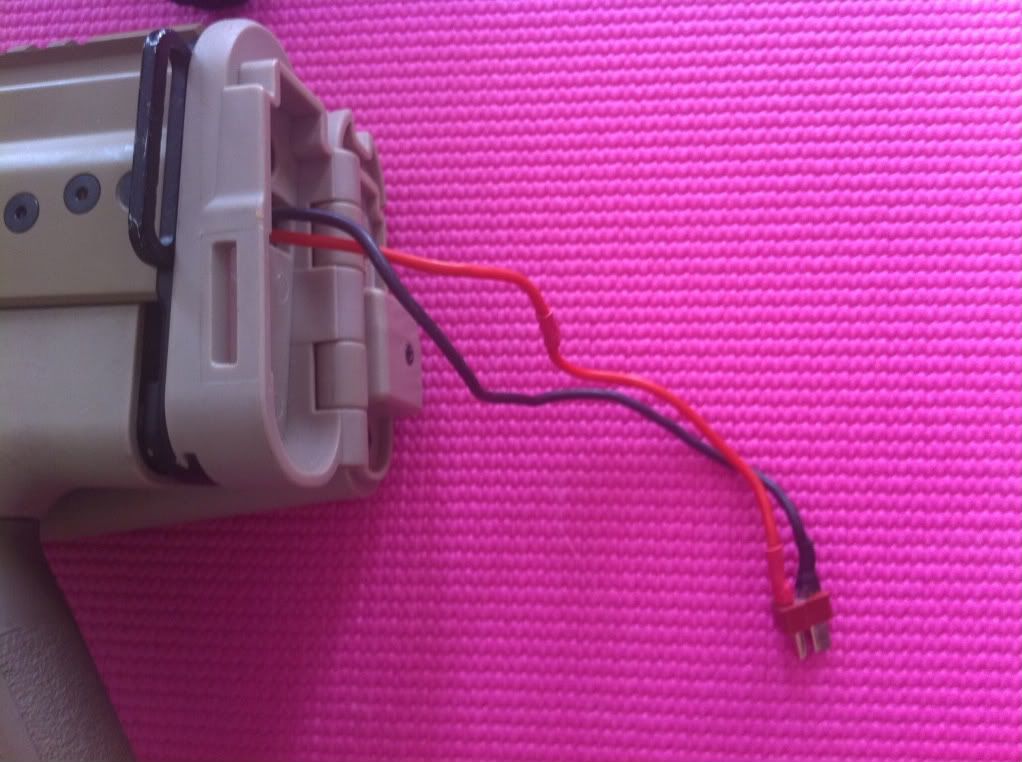 The lower receiver separated will look like this...  Step #8 Next we need to remove the pistol grip, we do this by unscrewing the screws at the bottom of the grip. After the 2 screws are removed we must take the connectors off of the motor and then remove the motor. Once the motor is out we must unscrew the 2 screws in the grip left and then feed the battery connector wires through the holes and the grip will come off.  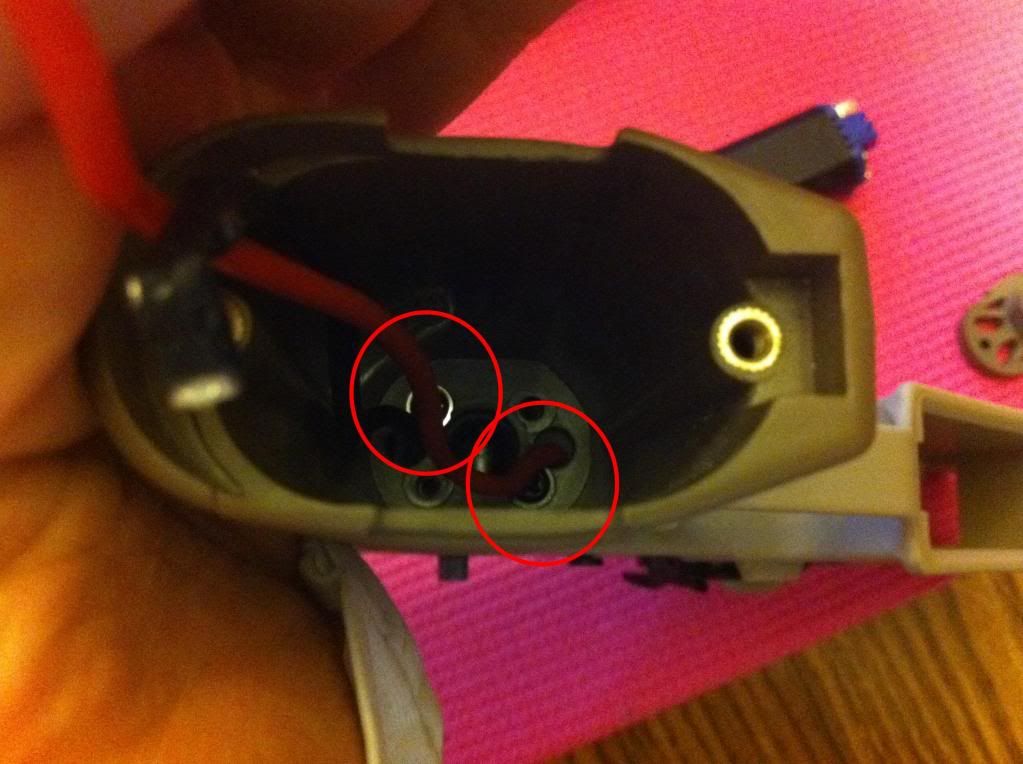 Step #9 In order to get the mechbox free of the lower receiver we must first remove the pin holding it in between the fire selector switch and magazine release buttons. After the pin is out, it's a bit tricky to pry out the mechbox, but the best approach is to use two screwdrivers to pry each side of the receiver and wiggle the mechbox, it will come free eventually.  The mechbox shell separated will look like this... 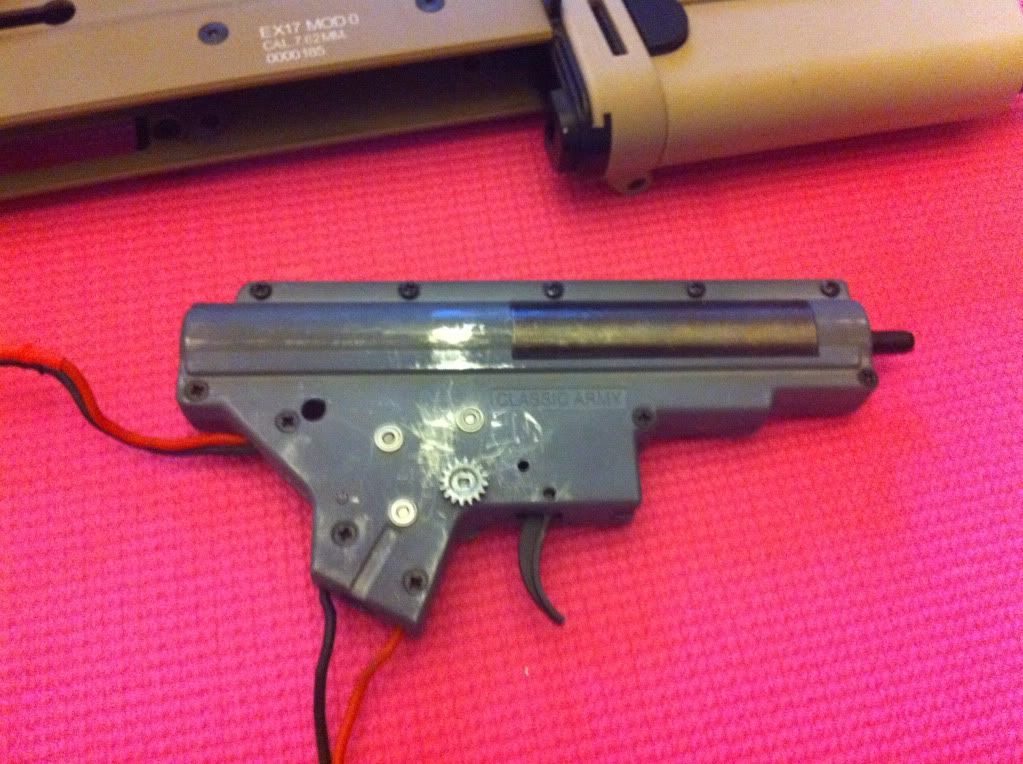
Last edited by W@tchtower; May 4th, 2011 at 11:02.. |
|
|
|

|
|
|
#2 |
|
Some fixes for problems I've had with the SCAR-H:
1) The gun wouldn't shoot or make any noise: The problem, as I'm sure many other posts have stated before, was that one of the connectors to the motor had come loose, the red and black cords from Step #8, you can see the wires in Step #8b. All that has to be done is the hand cover unscrewed and the connector put back onto the proper connector on the motor. Not exactly the best fix to have to do in the field, but I've had to! Another problem to this could be your battery is dead, but if you know you charged it before the game, you probably have a loose connector. 2) The gun makes a grinding noise and doesn't shoot any BB's: The problem is that the motor has come loose. The solution is the simply tighten the middle part of the motor, shown in Step #8, with a flat head screwdriver bit. 3) The fire selection switches are misaligned or do not work properly, ie) Safety doesn't work: This is one of the main issues that I had with my gun and the reason I basically took it apart to fix it. The problem is that the gears on both sides of the gun, since it is ambidextrous, are not aligned properly and hence one side is preventing the switch from properly moving the slide on the mechbox from cycling to the proper position. The solution, painstakingly, has a lot to do with luck, as I had to pop the mechbox out of the lower receiver and try to re-align them atleast 4 times. The way that I found works best is to have the switch on the right side of the gun (looking down it from the stock) set to 1 (semi) and the other switch on the left side of the gun (the switch that can rotate in all directions) set to the 6 o'clock position. From there, try and keep the two fire selection switches in those positions as you are putting the mechbox back in. Once you've popped the mechbox in, turn the left fire selection switch (the one that pivots in all directions) to semi and if they are not aligned properly you just have to try again. 4) A loose fire selection switch The problem for this is that the little screw on the selection switch needs a little bit of tightening. The solution is to hold the selection switch so that it is flat, make sure it is not resting on one of the sides of the gun, and tighten the small screw in it until it is snug. Probably best to not over tighten it too much, but enough that it is not moving laterally when used. 5) A broken motor connector One of the easiest things to perhaps identify! The problem is that somehow your motor connector broke and is no longer making the connection you need it to. The solution is going to require you have a soldering iron, solder and a FEMALE disconnect (22-18 AWG), I found it at Canadian Tire in the Auto Section. What you need to do firstly is cut of your old connector, removing as little wire as possible. Next you need to remove the insulation off of your disconnect so you just have bare metal on it, then carefully bend it at a 90 degree at the middle of the piece. Once your connector is at 90 degrees and bare, you need to take about 1/4" of rubber off of the wire that is missing the connector, MAKE SURE YOU DO NOT CUT THROUGH THE WIRE, so you just have bare wire that will make the connection to the disconnect. Now you need to feed the wire into the disconnect until it reaches down to the ridge in the disconnect. Now you simply solder the wire to the disconnect, remember, more solder is NOT better, you want to use as little as possible. Last edited by W@tchtower; May 6th, 2011 at 10:19.. |
|
|
|

|