
|
|
|
|
|
||||||||
|
|
|||||||||
| Home | Forums | Register | Gallery | FAQ | Calendar |
| Retailers | Community | News/Info | International Retailers | IRC | Today's Posts |
 |
|
|
Thread Tools |
 September 21st, 2011, 00:31
|
#1 |
|
|
.::RA-Tech WE M4/M16 Steel Bolt Tutorial::.
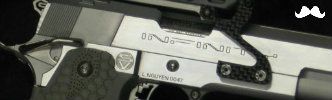
 This is Turok’s official RA-Tech WE M4/M16 steel bolt tutorial. In this guide, you will learn how to modify the steel bolt for flawless and smooth operation in your new open bolt system. This guide is not meant to be a “be all, end all,” but serves a starting point for modifying the RA-Tech M4/M16 steel bolt. Please feel free to contribute your comments, solutions and ask questions to help the community. The modifications presented in this guide were discovered through my personal experience with my GBBR. Please note that all guns behave differently and should be modified according to their own performance and to the operator’s preference. The modifications presented in this guide may not be a necessity for your build, but are only recommended to assist you when installing this upgrade steel bolt. I can not emphasize enough that you should only perform modifications that are required, so please do no perform every modification in this guide just because they are suggested. What tools are needed to perform the modifications? As shown below, a dremel, a set of drill bits, a set of filers, and 1000 and 1500 grit sandpaper were used to perform the modifications.  Why should you purchase the RA-Tech WE M4/M16 steel bolt (RAG-WE—065)? The RA-Tech WE M4/M16 steel bolt is much more sturdy, and more resistant to wear and tear from internal components of the gun. Referring to Figure 1.0, you can tell that there are lots of “dings” and craters produced on areas near the rail of the stock WE M4 bolt. This is created from the buffer retention pin when the bolt cycles. Figure 2.0 also shows how the roller on the hammer gradually creates a crater on the bottom of the bolt. This issue has been initially observed by users on the Gasguns.com forum and I can attest that this issue occurs. Please note that the wear/tear as seen in the photos below resulted from no more than 4 magazines, and no more than 40 times of racking the charging handle. Figure 1.0  Figure 2.0  The second reason you may consider purchasing the RA-Tech steel bolt is because of its weight. Below is a photo (Figure 3.0) to compare the weight between the stock WE bolt and RA-Tech’s steel bolt. A heavier bolt creates stronger recoil and a better kick. Figure 3.0  What are the modifications that need to be achieved? When you first install the RA-Tech steel bolt into your open bolt system, you will experience jams and resistance when racking the bolt, and may even fail to close both halves of the receivers. My methodology in determining the modifications required was to isolate each internal component that interacts with the steel bolt. These components include the hammer, auto sear, buffer retention pin, bolt catch, and magazine. After each fit between each component and steel bolt has been examined, all parts were reassembled to determine the final fit. You may consider employing the same strategy to tailor all your modifications to the steel bolt. Modification #1 The first and most simple modification involves the ends of the tunnel at the bottom rear half of the bolt that slides along the buffer retention pin. Looking from the back, there is a small window of clearance for the buffer retention pin to slide, and considering that the retention pin can be depressed, having a completely flat surface at the bottom of the tunnel may impede the bolt from retracting when it is in front of the pin (Figure 4.0). Although there are already two triangular ramps on the adjacent sides, a third ramp downwards in the middle of the tunnel would allow the buffer retention pin to depress/enter and slide more gradually into the rail of the bolt when the bolt is pulled back (Figure 5.0). Figure 4.0  Figure 5.0  The next modification involves the other end of the tunnel. As the bolt travels rearwards, the buffer retention pin slides closer to the middle of the bolt, and eventually exits the tunnel. When the bolt returns to battery (forward direction), the buffer retention pin needs to enter the tunnel again at the bottom of the bolt. However, given the rectangular shaped entrance of the tunnel with such a small window of clearance, the buffer retention pin will obstruct the bolt in fully returning to battery (Figure 6.0). As such, three ramps need to be created: first ramp downwards along the entrance of the tunnel, and two ramps at the corners adjacent to the tunnel (Figure 7.0). These three ramps help guide the buffer retention pin enter the bolt tunnel more gradually and smoothly. Both the stock WE and RA-Tech open bolts do not have these ramps, but the stock WE closed bolt has this ramp. I’m not sure why WE did not implement the same design for the WE open bolts. In the absence of these ramps, craters (at least in the stock WE open bolts) would be formed from the impact of the the buffer retention pin as shown in Figure 1.0. Figure 6.0  Figure 7.0 Modification #2 Sometimes when the hammer is uncocked, it takes greater force to cock it back via the charging handle/RA-Tech steel bolt. When the bolt retracts, it pulls back the hammer using the notch that dips right about halfway on the bolt (Figure 8.0). A close inspection of the RA-Tech steel bolt shows that the notch is less in height compared to the stock WE bolt (Figure 9.0). The problem with having a lower notch is that it applies a greater amount of downward pressure on the roller of the hammer. This means that a greater force is required to pull the hammer back via the charging handle. As such, this area on the RA-Tech steel bolt needs to be grinded down to raise the notch (Figure 10.0). This modification is not a necessity as you can simply pull the charging handle with greater force. However, I can attest that performing this modification made a huge difference when pulling the charging handle. Also, I have noticed two different versions of the stock WE M4 open bolts. I think WE finally realized that their bolts are prone to craters at the region that impacts the roller of the hammer. As such, they added a ramp to smoothly cock the hammer (Figure 11.0) Figure 8.0  Figure 9.0  Figure 10.0  Figure 11.0  Modification #3 After the RA-Tech steel bolt is assembled and installed in the upper receiver with the trigger pack in the lower receiver, pulling the charging handle to rack the bolt can cause the fire selector to rotate from SEMI to AUTO. This is caused by the sharp angle on the bolt that the auto sear needs to negotiate before riding on the bottom of the bolt (Figure 12.0). As such, smoothen the edge to create a ramp so that the auto sear can smoothly and gradually ride along the bottom of the bolt as it retracts (Figure 13.0). Also, some users may also need to sand the upper edge of the auto sear if it is too high, since the RA-Tech bolt sits slightly lower than the stock WE bolt (Figure 14.0) Figure 12.0  Figure 13.0  Figure 14.0  Modification #5 When a magazine is inserted, it is common for it to drop from the magwell since it is not locked in place by the magazine catch when the steel bolt is in the forward position. This is caused by the increase height of the lower edge of the RA-Tech steel bolt which blocks the magazine from being fully inserted in the magwell (Figure 15.0). The extra height needs to be grind down in order to achieve a height similar to the stock WE bolt (Figure 16.0) Figure 15.0  Figure 16.0  Modification #6 When a magazine is successfully inserted in the magwell and the RA-Tech bolt is in it’s forward position, pulling the charging handle can cause the nozzle to adhere to the hop up chamber. You can apply as much grease as you want, but it won’t solve the issue. The reason for this occurrence is because the magazine lip pushes the tip of the nozzle so that it is slightly angled upwards. When this occurs, the nozzle can not retract from the hop up chamber because the rear of the nozzle hits the lower edge of the bolt (Figure 17.0). If you inspect the stock WE bolt and the RA-Tech bolt, the WE bolt has a subtle ramp that facilitates the air nozzle in gliding back into the bolt (Figure 18.0). A similar ramp needs to be created on the RA-Tech bolt to aid the air nozzle to retract when a magazine is inserted. Figure 17.0  Figure 18.0  Modification #7 With the bolt catch installed and the RA-Tech bolt in the forward position, it is common that there is a lot of resistance when pulling the charging handle to rack the bolt. This may be caused by the bolt catch itself. A close inspection of the stock WE bolt and RA-Tech steel bolt shows that the surface for the bolt catch to ride is lower and less steep for the RA-Tech bolt (Figure 19.0). This applies pressure on the upper tip of the bolt catch creating resistance when the bolt is racked. Therefore, the angle and height of the edge of the bolt catch must be reduced in order for it to ride on the RA-Tech steel bolt (Figure 20.0). Caution should be taken when filing down the height of the bolt catch. Remove the material slowly, as removing too much can reduce the contact areas between the bolt catch and the bolt, which in turn, nils the function of the bolt catch (i.e. the bolt catch doesn’t work). Figure 19.0  Figure 20.0  Similar to the closed AWSS system, if your bolt catch is not operating, shorten the bolt catch spring so that the magazine plate (the part that pushes up the bolt catch) can overcome the spring tension with greater ease, and remove the horizontal section of the bolt catch (Figure 21.0) in order for it to pivot more towards the upper receiver to maximize its contact with the bolt (Figure 22.0). Figure 21.0  Figure 22.0  Moreover, if you wish to further enhance the bolt catch function, adding washers or spacers in the buffer tube will allow the bolt catch to engage the bolt earlier from its return travel. When the bolt catch engages the bolt earlier, it means less kinetic energy is exerted on the bolt catch (think about the stored energy of a spring applied to the bolt right when the bolt returns to battery, versus the stored energy exhibited right when it begins to travel forward after its most rearwards/peak position), which means less chance that the bolt will slide through the bolt catch. This will also help to preserve the integrity of the bolt catch since less force is impacting that small piece (the part that actually engages the bolt) of the bolt catch. Confused? Modification #8 Finally, examining the top of the stock WE bolt versus the RA-Tech steel bolt shows that there are differences (Figure 23.0). When fastening the screw for the upper nozzle guide (not sure its name, rail key?) I found that the screw would not go deep enough to reach the thread of the bolt. However, this did not occur on my other RA-Tech bolt. If this problem occurs, thin out the bottom surface of the upper nozzle guide in order to reduce the overall height so the screw can reach the threads of the bolt (Figure 24.0). After you complete this modification, the actual rails that guide the bolt may be too low which may impede the movement of the nozzle inside the bolt. As such, lightly sand the lower surface of the actual rails so that it does not hang low enough that it obstructs the movement of the nozzle (Figure 25.0). Figure 23.0  Figure 24.0  Figure 25.0  THE END! After all the mods have been made, this is how it performs: 
Last edited by turok_t; October 4th, 2017 at 17:24.. |

|

|
|
September 21st, 2011, 00:38
|
#2 |
|
A-56 aka Mr.Hitman
|
Shit... That's alot of modding for an aftermarket bolt. Would RA-Tech make these changes?
Great job on grinding down steel and modifications! |
|
|
|
|
September 21st, 2011, 01:04
|
#3 |
|
a.k.a. cloaked
|
Great stuff, thanks for putting the time and effort in making this. Really helpful.
|
|
|
|
|
September 21st, 2011, 15:13
|
#4 |
|
|
Thanks!
|
|
|
|
|
September 21st, 2011, 15:42
|
#5 |
 E-01 E-01 |
Awesome stuff, Turok!
__________________
|
|
|
|
|
April 11th, 2012, 15:10
|
#6 |
|
Is there a tutorial for the wetech hk416 on this forum
|
|
|
|
|
|
August 21st, 2012, 23:24
|
#7 |
|
|
It's pretty sad that ra-tech made a solution to one problem but at the same time makes 8 more problems. That aside, Thank you turok! This will be my weekend project.
__________________

|
|
|
|
|
August 22nd, 2012, 01:15
|
#8 |
|
|
They updated their bolts, there should be 3 versions now. You shouldn't need to modify it as much or the parts it interacts with, but some of my mods made the bolt cycle more smOothyl
|
|
|
|
|
August 22nd, 2012, 20:41
|
#9 |
|
|
I only have a tiny file set so i just did a quick wimpy version of your mods. Mostly just getting rid of those sharp edges.
edit: It appears I cannot charge the charging handle with the ra-tech bolt in. If i manually press the hammer down with my thumb, and then put the receivers down, and then charge the gun it works. but when the hammer resets i cannot pull the bolt. what do you think turok?
__________________
Last edited by Ross; August 22nd, 2012 at 21:45.. |
|
|
|
|
August 22nd, 2012, 22:33
|
#10 | |
|
Quote:
I got one back in June I think (with the new nozzle). Cycling wasn't terrible but there was a ton a friction when locking it back with the charging handle. Definitely not anywhere close to as smooth as with the stock one. |
||
|
|
|
|
August 23rd, 2012, 00:00
|
#11 | ||
|
|
Quote:
What do you mean by "put the receivers down?" Did you shave the top of the bolt catch? the slant/angle where the bolt catch rides isn't the same compared to stock. Quote:
|
||
|
|
|
|
August 23rd, 2012, 00:17
|
#12 |
|
|
Sorry, I meant receivers together. Instead of down. I have filed the bolt catch down a lot. I had it removed completely while I was having the issue. I used sandpaper to perform your mod#2. It took 4 hours of sanding in that little spot, but now I can finally rack the bolt if I hold the gun with my knees and pull on the charging handle with both hands.
I'm going to keep working on this tomorrow.
__________________
|
|
|
|
|
August 23rd, 2012, 00:50
|
#13 |
|
Green Synergy
|
This bolt was a PITA to install, but now that it's running, it's amazing.
|
|
|
|
|
August 23rd, 2012, 01:49
|
#14 | |
|
|
Quote:
If I only I was there, I can fix it for you in 10 mins |
|
|
|
|
|
August 23rd, 2012, 17:34
|
#15 |
|
|
Yup. after more sanding it's getting easier and easier. it just sucks to not have a dremel.
__________________
|
|
|
|
 |
|
||||||
| Bookmarks |
|
|
 |
|